Hop on the Cactus Trend — in Watercolor!


We all love these little prickly plants, and not just when they're in pots! The fun shapes and colors of the desert darlings are super-fun to incorporate into your art as well.
There are several different methods for painting a cactus. You can go totally realistic, abstract or somewhere in between. In this post, I'll show you how to paint two different types of cacti in a semi-abstract style.
Level: Easy
Looking at a picture of a saguaro cactus, lightly draw outlines in pencil on a piece of watercolor paper. You may want to layer several cacti, with some slightly behind others, to give your composition more interest. I chose to draw three tall plants, with two in front and one behind.
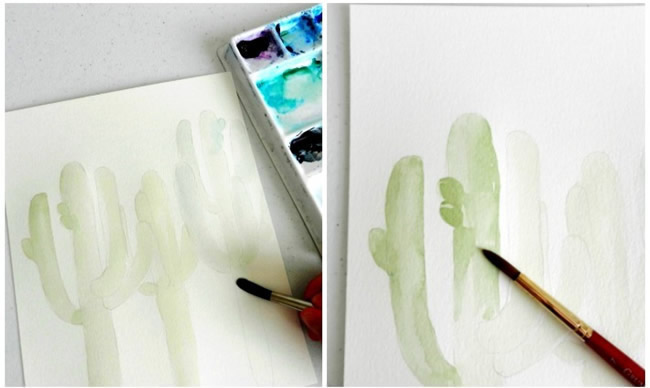
Using a medium round brush, apply a very light wash with watercolor paints. It's OK if you leave a little white space here and there. To add some variety, paint each cactus a different shade of green by mixing different amounts of yellow and blue . Let this first layer of paint dry slightly, then apply a second layer of green paint where you want there to be shadows or darker spots.
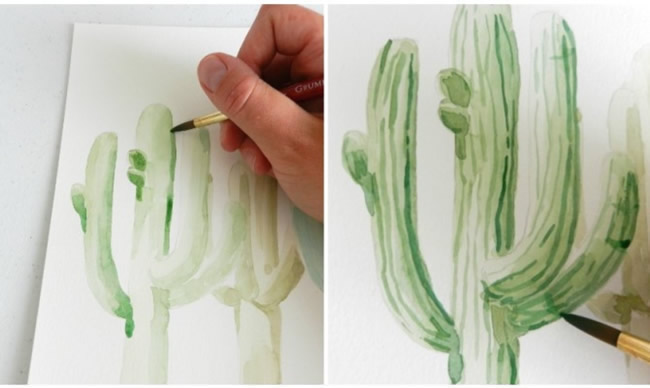
Switch to a smaller round brush. Apply another darker layer of paint to create more depth and accentuate the shadows. Take note of where the light source is coming from and where the highlights and shadows lie. This will help you get the shading in the right spots, but you don't have to be super accurate with this — it's not going to be a completely realistic painting, we're just creating some depth. When your shadows are detailed, let the paint dry.
Paint vertical lines and grooves on the cacti. Starting from the top of each cactus, paint vertical lines down. Make the lines darker on the parts of the cacti that are in shadow and make the lines lighter on the parts that are in the light.
Add pink and orange blossoms to the tops of the cacti. Create floral shapes by placing your brush at the top the part of the cactus and working small short strokes upward in a cluster. Remember to keep the blossoms on the cactus in the background lighter than the blossoms in the foreground.
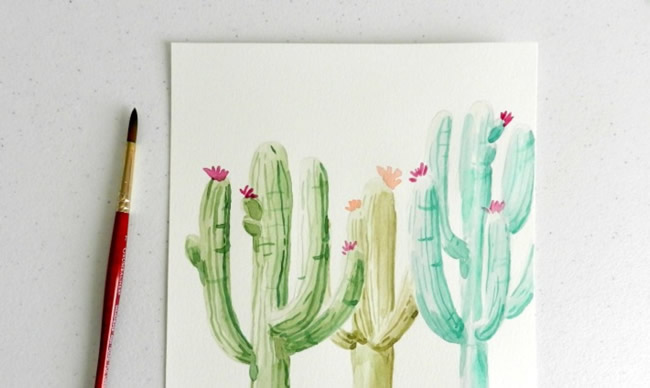
One cactus painting finished! One more to go...
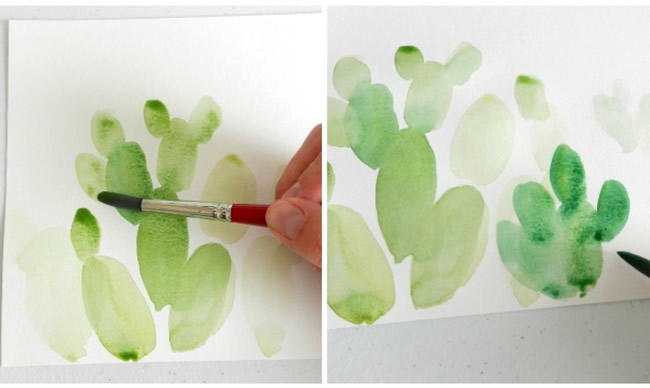
Find a picture of a prickly pear cactus to use as a reference. With a medium round brush, begin from the bottom of your paper and paint oval shapes in clusters. Vary the shapes and sizes of the oval clusters.
To add depth to your painting, paint lighter colored cacti in the background and darker colored ones in the front — this is easily done by changing the paint-to-water ratio . These different values give your painting some perspective.
Remember to keep the paint wet as you work so that you don't end up with hard edges between the different sections of prickly pears. Paint about three quarters of the way up the page. Leave the top section blank.
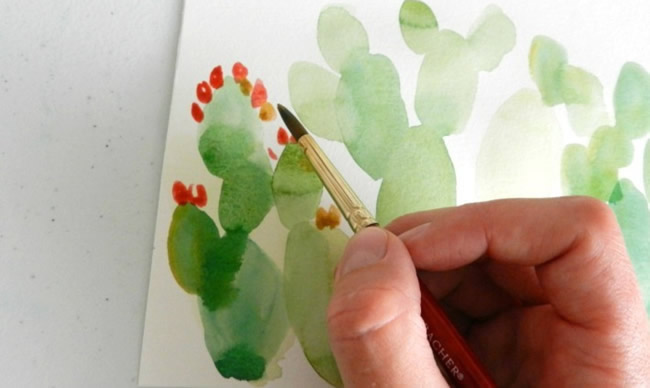
Now it's time to add on some prickly pear fruit! Using reds, yellows, oranges and pinks, paint small oval-shaped fruits on the tops of the plants. Use a smaller brush for this step.
Remember to paint the fruit in the background lighter than the fruit in the foreground, just as you painted the cacti.
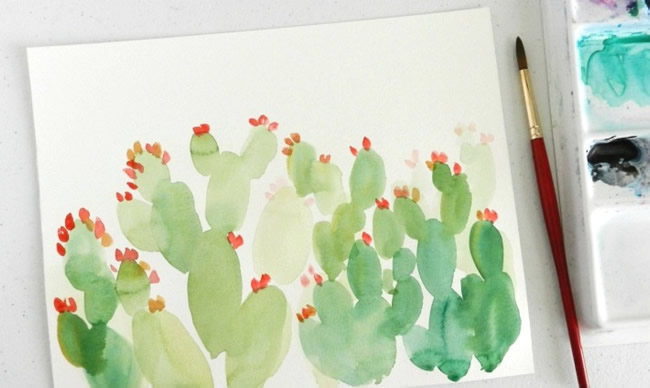
Let it dry and you're done — frame and enjoy!
