How to Cut a Stencil

Cutting your own stencils does require a little patience, but is easy and rewarding. With a few simple supplies, you'll soon be building your own stencil library.
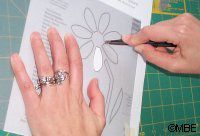
Use a few pieces of tape to secure the printout of the stencil design to the piece of acetate along the edges so that it doesn't slip when you start cutting the stencil. Position the design so there is a border of acetate at least an inch (2.5cm) around the whole design.
01
of 02
Marion Boddy-Evans
Always use a sharp craft knife start cutting out the stencil. A blunt blade makes the task more difficult and increases the risk that you'll get frustrated and less careful with it.
Begin cutting along the longest, straightest edges of the stencil design as these are the easiest. Your aim is to cut each line once only, so press firmly and smoothly.
Use your free hand to stop the acetate and stencil from moving off the cutting board, but keep your fingers well away from where you're cutting.
02
of 02
Marion Boddy-Evans
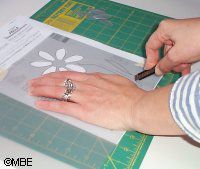
Turn the stencil around so you're always cutting at an easy angle. As you've taped the design to the acetate, it won't move out of place.
Once you've cut out the whole design, tidy up any rough edges (so paint doesn't get caught up in these), and your stencil is ready to use. It's time to get your stencil brush out and start painting.
