How to Make Crosshatch Drawings with Just Pen, Ink and 3 Easy Steps


Crosshatching is one of those terms that makes you go "Huh?" even though you probably know what it is. You just might not know that you know.
If you’ve ever looked at a pen-and-ink drawing, chances are you've seen crosshatching. It’s basically using crisscrossing lines to create texture and shadow . The simple technique gets impressive results once you learn how it's done. All you need are a few tools and some easy-to-follow steps.
Let's start by drawing a ceramic item with a geometric shape. Its angularity will be perfect for the straight lines we’ll be making. Pick an object you’d like to draw — preferably something that's fun to look at but that doesn't have a lot of detail.
You won't need to stock your shopping cart to do this project: You just want paper, a nibbed pen and sumi ink. Feel free to use any color ink you like. A fine-tip pen will work, too, as long as you’re comfortable using it.

It's a smart idea to sketch your subject first, before you start inking. Using ink right off the bat can be daunting because it's so unforgiving.
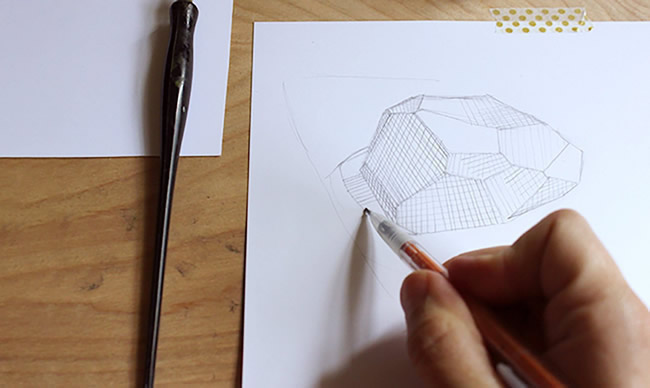
You can make the outline of your object, and draw in the hatched and crosshatched marks, before you go in with the ink. That way you can look at the drawing and add or erase lines before you reach the point of no return. Press lightly, since you don’t want to make any permanent marks.
Don’t forget the shadows! You can experiment with diagonal lines to make deep, rich darks.

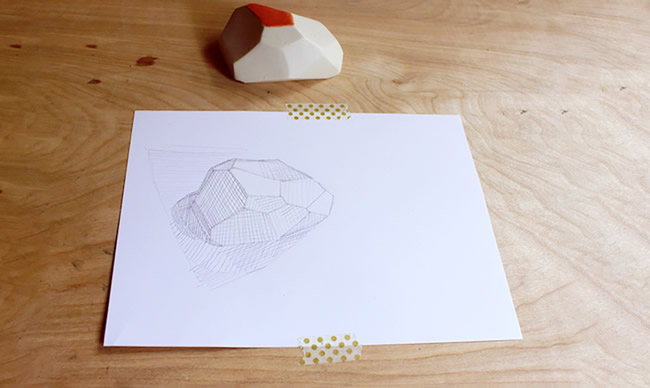
But first, stop for a second and assess your drawing. How does it look? Do the lines you drew accurately reflect the darkest and lightest parts of your object? For the lightest areas, you don’t need to draw any lines at all, or you can spread them far apart. To draw the darker parts, you'll need to place your marks closer together and draw a lot of them.
Now comes the fun! Take your pen and dip it in the ink. If you're using a pen with a nib, keep an extra sheet of paper nearby to mark on right after you dip. This lets you unload some of the excess ink instead of accidentally bleeding it on your drawing, and gives you more control over the ink flow.
Start carefully tracing over your lines. Don’t be afraid to add more hatching, or to skip the hatching altogether. It's up to you. Follow your instincts.
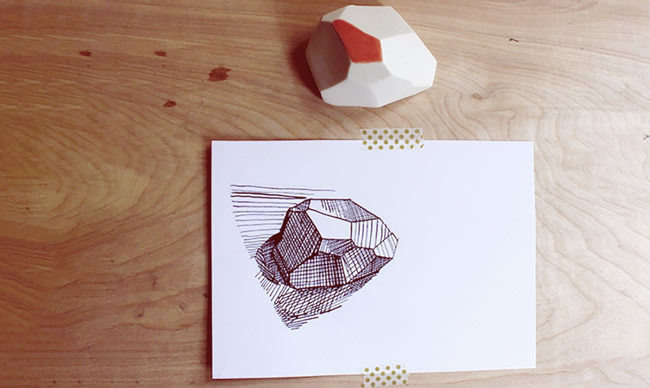
Now it’s time for the waiting game. You're almost done, but you have to pause until the ink dries on the page so you can erase any pencil lines still peeking out. The finished drawing should showcase the angles of the object you drew. It may not be the most realistic portrayal, but it should capture the highlights and shadows and give a clear sense of form.
Got the hang of it? Now choose your next object, get your pen and ink ready, and crosshatch away!
