How to Paint Animal Fur That Looks Realistic (And Why You Should Love Your Mistakes)

It's pretty much impossible to paint animals without knowing how to paint fur. True, not every species has fur, but if you want to paint animals that look real, at some point you'll need to deal with the fur factor.
It's definitely intimidating at first. Texture is one of the most challenging things to paint, and that goes double for fur, whether it's long, short, fluffy or straight. If you're like me and find fur daunting, it helps to break down the process into a few easy steps.
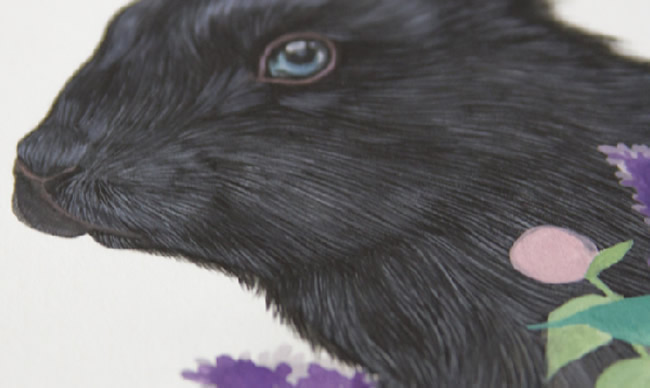
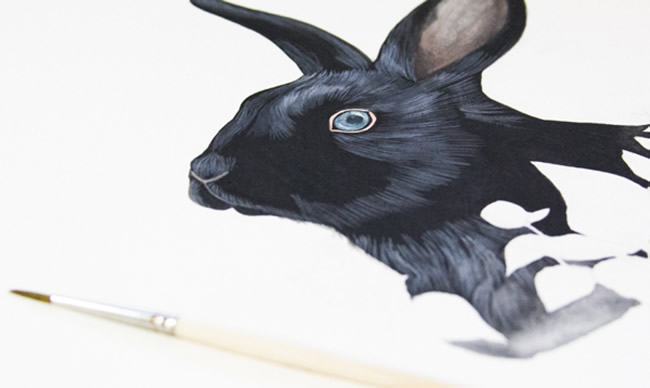
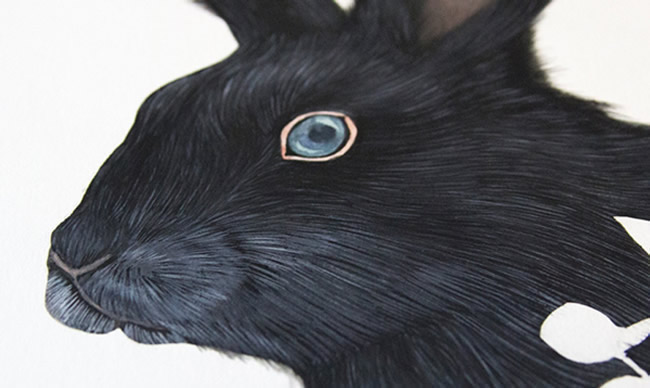
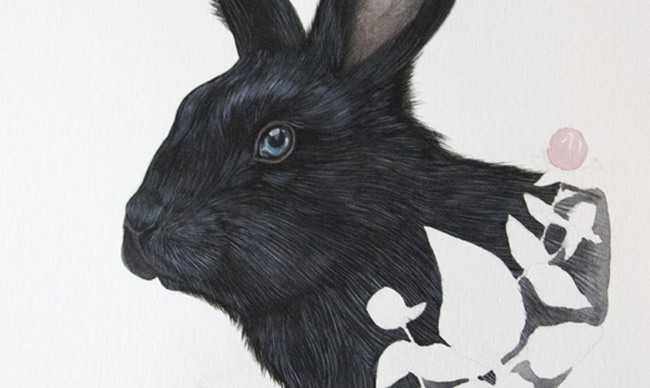
After avoiding fur in my paintings for the longest time, I used a mix of trial and error, research, and long bouts of staring off into space to figure out some methods that work well for me. These tips are especially effective for short fur, like the kind you see in my rabbit painting above.
This is a new painting I've been working on, and although I used gouache , you can easily adapt these techniques to any medium. Just keep in mind that for the particular technique I used in the rabbit painting, it's important to let the paint dry thoroughly between each new layer of fur.
Here are some simple tips for creating realistic fur.
Start with the underlying shadows first. This helps to create a solid base you can build layers on, and adds depth and realism to your subject. Only go as dark as your darkest tone.
Begin layering individual strands of fur over the base color, gradually lightening the tones with each new layer. The idea is to end with the lightest highlight color on the top layer. It helps to imagine each layer of fur sitting on top of the one before it, like shingles on a house, each one overlapping the other slightly.
Make sure to pay attention to your values as you paint. Areas that are more shadowed won't need as many layers. Again, it's important to let each layer dry completely before starting the next. If the paint isn't dry enough, the colors will muddy, and you'll lose definition between the strands of fur.
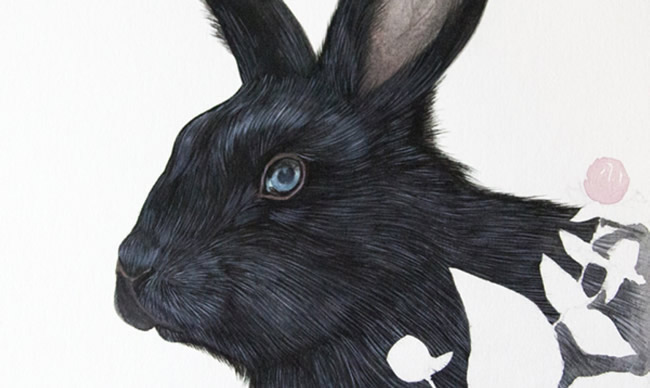
It helps to work in small sections, paying attention to the direction of the fur. If you look closely at the fur you're painting, you'll notice that it doesn't just grow in one direction, especially in the areas around the face. Take note of your reference and try to work from area to area: around the muzzle, above the eye, the cheek, etc. This lets you focus on each of the shapes that make up the face , and adds depth and realism to the features.
I tend to start with the outlying areas and gradually paint my way inward, following the direction of the fur.
Look over your work one last time, focusing on the details. Subtly touch up your shadows and highlights, until everything looks just right to you.
Be patient with yourself as you learn. Painting fur can be a tricky, hair-pulling experience (um, pun intended). It usually comes down to your precision with the brush. As you paint, it's helpful to keep a scrap sheet of paper or canvas nearby so you can practice as you go, and avoid certain kinds of mistakes.
When you're painting something as fine as individual strands of fur, the fluidity of your paint is crucial. If the paint isn't wet enough, you won't get proper flow. If it's too wet, the strands will lose their definition, and you risk creating puddles or blobs. Use the scrap sheet to test the fluidity of your paint until it feels right.
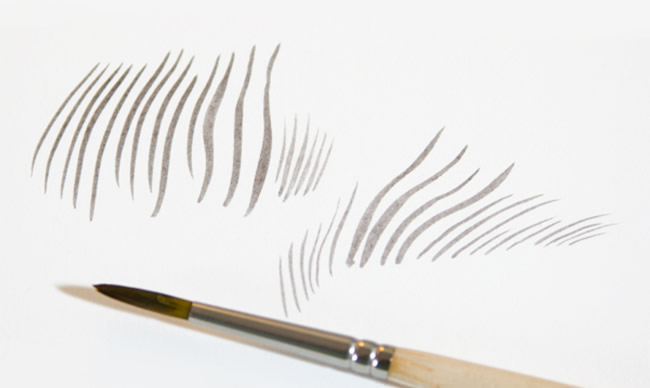
On your scrap sheet, you can also practice making long motions with your brush, starting with more pressure at the beginning of the stroke and gradually releasing pressure at the end of the stroke to create the tapered look of fur.
As with any technique, experimenting is key. Remember that with art, there's no wrong way. When I started painting, I used to avoid anything I didn't think I could paint "correctly," like hands, or fur of course. It took hours and hours of practice to realize that some of the imperfections in my work gave my paintings character.
Sure, practice does make perfect. It allows us to fix problems and improve our technique, but it also lets us discover the kinds of "mistakes" or quirks that actually make our art better.
Now, it's your turn to practice these techniques and come up with your own unique, perfect-in-their-own-way animal drawings!
Detail of work in progress "The Black Rabbit of Inlé" by Kelly Mitchell Gazdowicz.
