You Will Stencil Like a Superstar If You Follow These 7 Tips

Stencils are a ridiculously easy way to add hand-crafted style to any boring surfaces in your house — walls , ceilings, floors, furniture, fabric , mirrors, you name it.
Plus there's something so satisfying about the process of creating a design just once and then replicating it over and over and over again.
Just be sure to take your time (this is hugely important!) and follow the tips here to become a stencil master.
You want something thin but sturdy that can hold up to pigment. Plastics like Mylar and acetate are great choices because they're inexpensive and easy to cut with an X-Acto knife or scissors. They're also easy to wipe down once you're done painting.
You don't need a lot of fancy tools for stenciling, but having the right equipment will make your life easier.
Figure out where you want your stencil to be and tape it in place so it won't move as you work. Don't be afraid to adjust the position of the stencil as many times as you need to before you start painting. Once you've gotten started, it's too late!
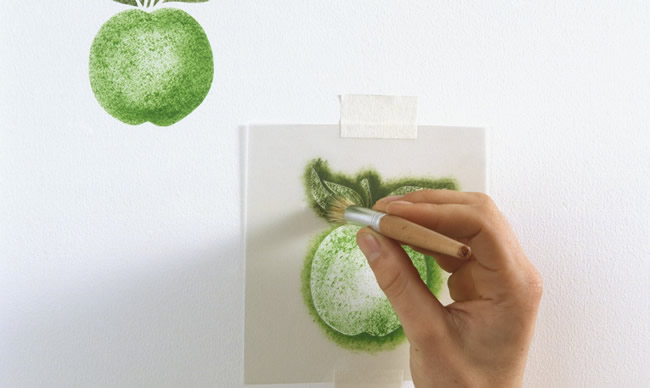
At its core, stenciling is a dry brush technique. After you dip your brush into paint, always dab it on a paper towel or rag to remove any excess.
When applying paint in the middle of the stencil, dab it on — this is is more effective than stroking. Along the edges of the stencils, though, you want to make light, quick strokes to prevent paint from bleeding.
As you work along the edges, always angle your brush in toward the middle of the stencil to prevent bleeding.
Plastic stencils are great for multiple uses — as long as you clean them when you're done. Soap and water does the trick.
