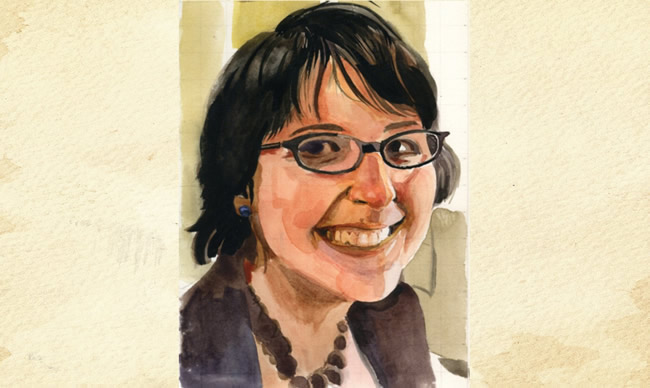
Your Watercolor Portraits Will AMAZE If You Follow These 5 Steps


We all know that painting a portrait is a challenge, and painting a portrait in watercolor is even more so. But if you do it right, a watercolor portrait can be an incredibly satisfying project.
Doing anything in watercolor requires a little planning and patience. Whether you’re painting from a photograph or from life, it helps to establish your composition first. Knowing how much of your subject you'll be painting makes things much easier down the road.
I’ve cropped the photo below from a “landscape” format, matching the dimensions of my paper. If you're painting from a photograph, it can be useful to transfer your image using a grid.
Here's how I translated this photo into a watercolor portrait.

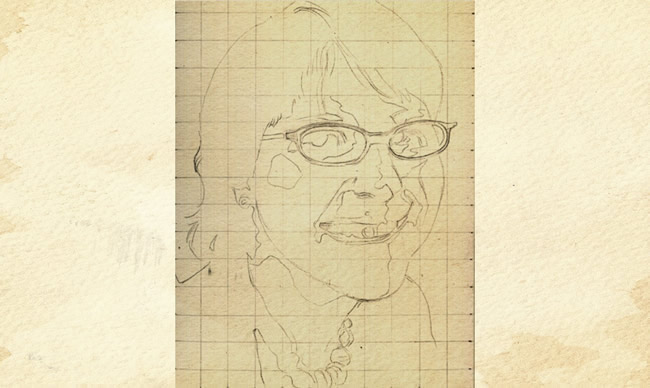
Do this lightly in a hard pencil, such as 4H. Pay close attention to the dark and light shapes; the details will come later.
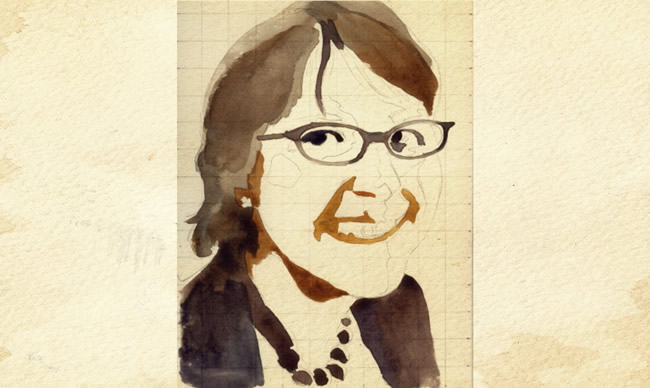
Use dark washes, but avoid black. Instead, combine burnt umber and dark blue for anything exceptionally dark. It helps to squint your eyes while looking at your subject to help isolate the dark values. Don’t worry that these washes aren’t as dark as they could be — you'll have a chance to adjust them later.
This next tip is important! Be sure to let each layer of washes dry completely before laying down new ones. This is especially critical when laying down light washes, as they can pull in dark pigment from an earlier wash and become muddy if you rush the process.
Using lighter washes, block in the lighter values of the face, leaving the lightest areas untouched. Avoid oversaturated colors by using plenty of water in your washes, and tone down your warm washes with a tiny bit of a cool pigment, such as a dark blue, to keep them from becoming too intense.
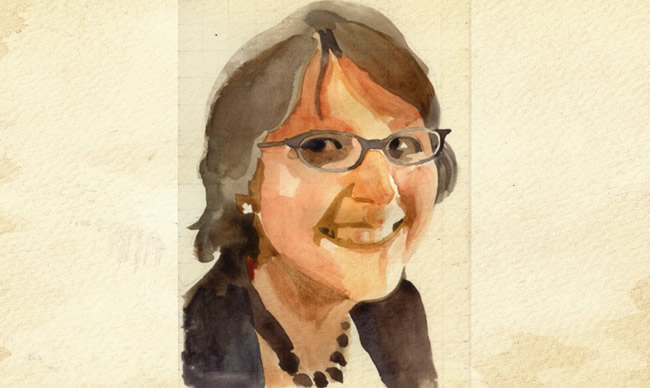
You can “pull up” any areas that have gotten too dark by using a clean, wet brush. Dab the brush against the dark area once it has dried to push and pick up any excess pigment, or to blend a new wash with a previous one without leaving a line or “tide mark.”
After laying down your lighter washes, it’s easier to see where your first washes can be darker. Using a higher ratio of pigment to water, go back and re-establish the darkest values — in this case, the hair and glasses.
For hair, pay attention to the location of highlights. You can often showcase these just by leaving a previous lighter wash visible while blocking in darker values. You don’t need to paint every strand; the value difference will show the viewer that the hair is shiny.
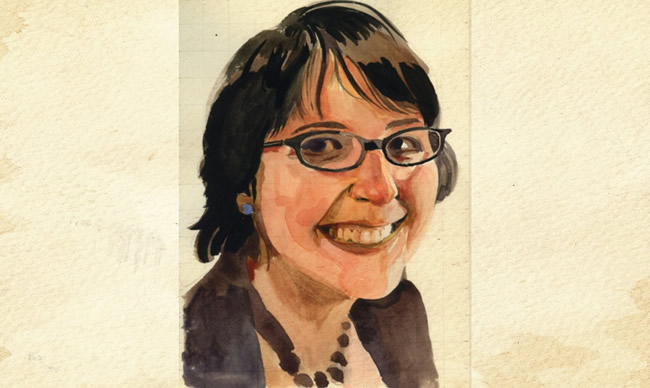
Work into the details of the face with a smaller round brush.
Here I’ve chosen a muted yellow-green as a complement to the warm tones in the face. The background wash can also serve to set off the highlights in a face, in this case the lower right, where the cheek had previously been hard to differentiate from the white background.
Since this is a watercolor, leaving things loose and gestural is better than overworking. Let the watercolor do what it wants to do, and you should be able to conquer your portrait like a pro!
